Tutorial: Writing your First Commodore Component
This tutorial will guide you through the required steps to create your first Commodore Component.
Commodore Components allow you to customize and extend the number and variety of tasks that you can perform with Project Syn. Using Commodore Components, you can customize and apply changes to all of your clusters, ensuring conformity, coherence, alignment, and drastically reducing the workload for DevOps engineers.
There are many Commodore Components already published; they perform various tasks, all related to the maintenance of Kubernetes clusters of many different kinds, including OpenShift, Minikube, Rancher, and K3d clusters.
This tutorial has been prepared with the following versions of Syn components in mind:
-
Commodore: 1.31.0
-
Lieutenant API: 0.12.2
-
Lieutenant Operator: 1.11.11
Project Syn is moving fast, and we will update this tutorial accordingly as new features and capabilities are made available by the development team.
Introduction
In this tutorial, we are going to do the following:
-
First, we are going to launch two lightweight Kubernetes clusters in our laptop, one Minikube and one K3d, and then we’re going to federate them under the same tenant.
-
Then, we are going to create a very simple component, one that will deploy a workload in both clusters at the same time.
-
Finally, we are going to wrap up, not without first cleaning up all the different pieces of this experiment.
This tutorial should give you a good idea of how all the different pieces of Project Syn work together, and how Commodore Components fit in the picture.
Requirements
As for the required knowledge bits and pieces:
-
You should understand what Project Syn is, and its architecture.
-
You should have already followed the Getting Started with Project Syn tutorial, and be familiar with common Project Syn tasks.
This tutorial was built on a Linux system, and tested in both Linux and macOS; it should, however, be easily ported to other Unices, since all tools referenced here are cross-platform.
To follow this tutorial you will need quite an array of software in your system (the version numbers are the minimum required):
-
ngrok version 2.3
-
Docker version 19
-
Minikube version 1.12
-
K3d version 3.0
-
A GitLab account with your SSH key configured. You can use a private GitLab instance, if you have one nearby.
-
A GitHub account with your SSH key configured.
-
SSH-agent running with your SSH key added.
-
The following commands must be installed and available in your path: curl, jq,
ssh-keyscan, andbase64. -
We will be editing files with Visual Studio Code with the liamdawson.jsonnet-language extension.
This tutorial project contains a 0_requirements.sh script which outputs all of your currently installed versions of the aforementioned software packages.
| Please make sure that both your GitLab and GitHub accounts have SSH keys configured. |
Preparations
Follow these three steps before starting the tutorial:
-
Clone the repository of the tutorial:
git clone git@github.com:projectsyn/commodore-component-tutorial.gitandcd commodore-component-tutorial. -
Check all required tools by running the
./0_requirements.shscript. -
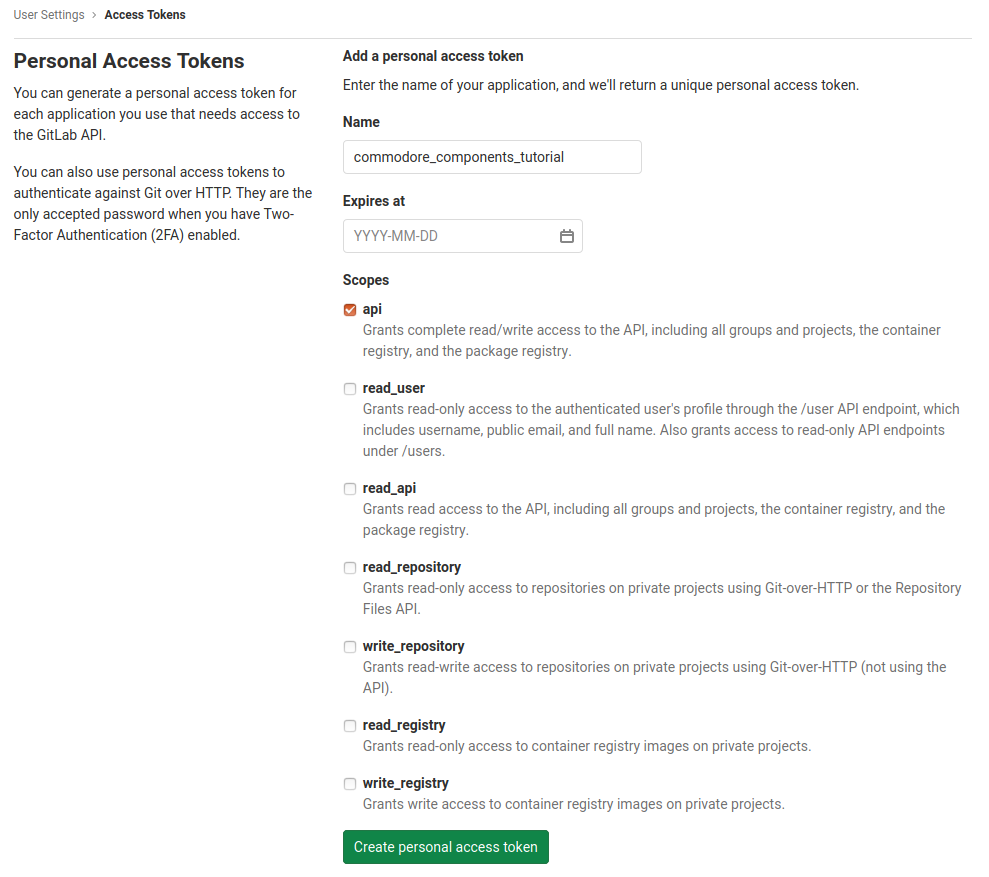
And in GitLab, create a Personal Access Token with API access.
| Remember to save your token somewhere, since it will only be visible once! |
Install Lieutenant Operator and API on Minikube
The Lieutenant Operator and its API are the major elements of a Project Syn installation. They provide a complete catalog of information about all of your clusters, and allow developers to operate on those clusters through a unique API.
In this tutorial we are going to install Lieutenant in the same Minikube cluster that we will use later on; this is usually not the case, and Lieutenant and its API are usually installed separately. Doing so will, however, simplify our setup greatly.
First you need to set a few environment variables:
$ export GITLAB_TOKEN="TOKEN_CREATED_PREVIOUSLY"
$ export GITLAB_ENDPOINT=gitlab.com # or your own GitLab instance, if any!
$ export GITLAB_USERNAME=your_gitlab_username
$ export COMMODORE_SSH_PRIVATE_KEY=~/.ssh/id_rsa
$ export GITHUB_USERNAME=your_github_username
To install Lieutenant Operator and API on Minikube, we are going to execute the ./1_lieutenant_on_minikube.sh script. This script mimicks the steps explained in the "Getting Started" tutorial, so we will not explain it here.
The script is quite self-explanatory. It will launch a new Minikube instance, will apply all the required kubectl commands, and wait for the cluster to be in the expected state before continuing.
It will also expose the Lieutenant API using the ngrok reverse proxy tool. You do not need a commercial (paying) ngrok account to use it; just download the version corresponding to your system and install it somewhere in your PATH.
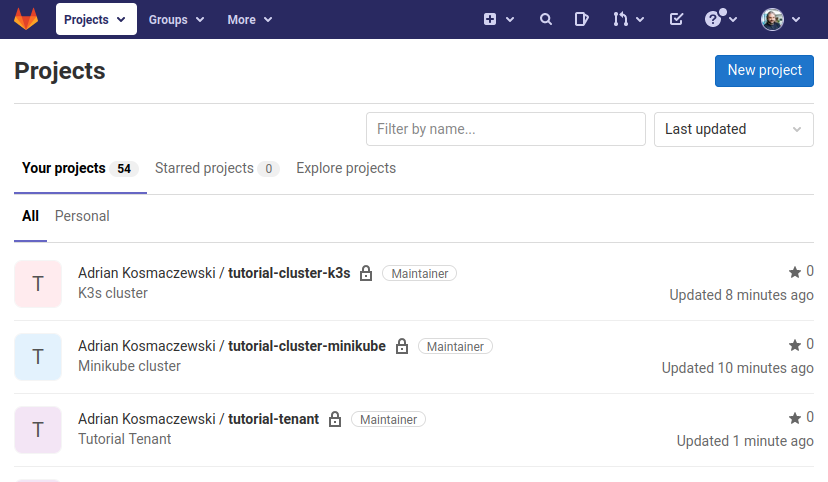
Once the script has run, you will find two new private repositories in your GitLab account: one named tutorial-cluster-minikube and another named tutorial-tenant. Project Syn tools use these repositories to perform "GitOps" operations on all the clusters.
Bootstrapping Commodore on Minikube
The second step in this tutorial is to bootstrap Commodore in our Minikube cluster. For that we can just run the ./2_commodore_on_minikube.sh script. This script requires an environment variable to run: COMMODORE_SSH_PRIVATE_KEY which should contain the path to your personal SSH public key.
Do not press the Enter key when prompted with the If you don’t see a command prompt, try pressing enter message! Instead, type the passphrase of your SSH key.
|
Install Steward on Minikube
Now that Lieutenant is installed we can install Steward on our cluster. This tool is in charge of bootstrapping Argo CD which watches the GitLab and GitHub repositories, and triggers the GitOps operations required to keep each cluster up-to-date.
We can easily install Steward on Minikube using the ./3_steward_on_minikube.sh script.
Synthesize a K3s Cluster
Now it is time to spin our second cluster, this time using K3s, itself managed using K3d. Again, a couple of scripts will make our life easier.
Let’s run a script that will not only spin a new k3s cluster, but will also install Steward and register it as a cluster belonging to our tenant. That is, we will create and "synthesize" our cluster in one operation.
| The term "synthesize" means performing all the required steps so that a cluster can be managed as part of a Project Syn metacluster. |
$ ./4_synthesize_on_k3s.shAnd now we are ready: we have two working Kubernetes clusters, one Minikube and one k3s, and both are assigned to the same tenant. To verify this, we ask now the Lieutenant Custom Resources, available in our Minikube cluster:
$ kubectl --context minikube -n lieutenant get clusters
NAME                  DISPLAY NAME       TENANT                AGE
c-damp-dew-2385       K3s cluster        t-muddy-sunset-5530   78s
c-small-cherry-9211   Minikube cluster   t-muddy-sunset-5530   48m

$ kubectl --context minikube -n lieutenant get tenants
NAME                  DISPLAY NAME      AGE
t-muddy-sunset-5530   Tutorial Tenant   49m
Of course, in your case the NAME column will show different, random values. But we can see both clusters and the tenant object, all happily residing inside the realm of our Project Syn installation.
For more information, check out the diagram in the Project Syn website.
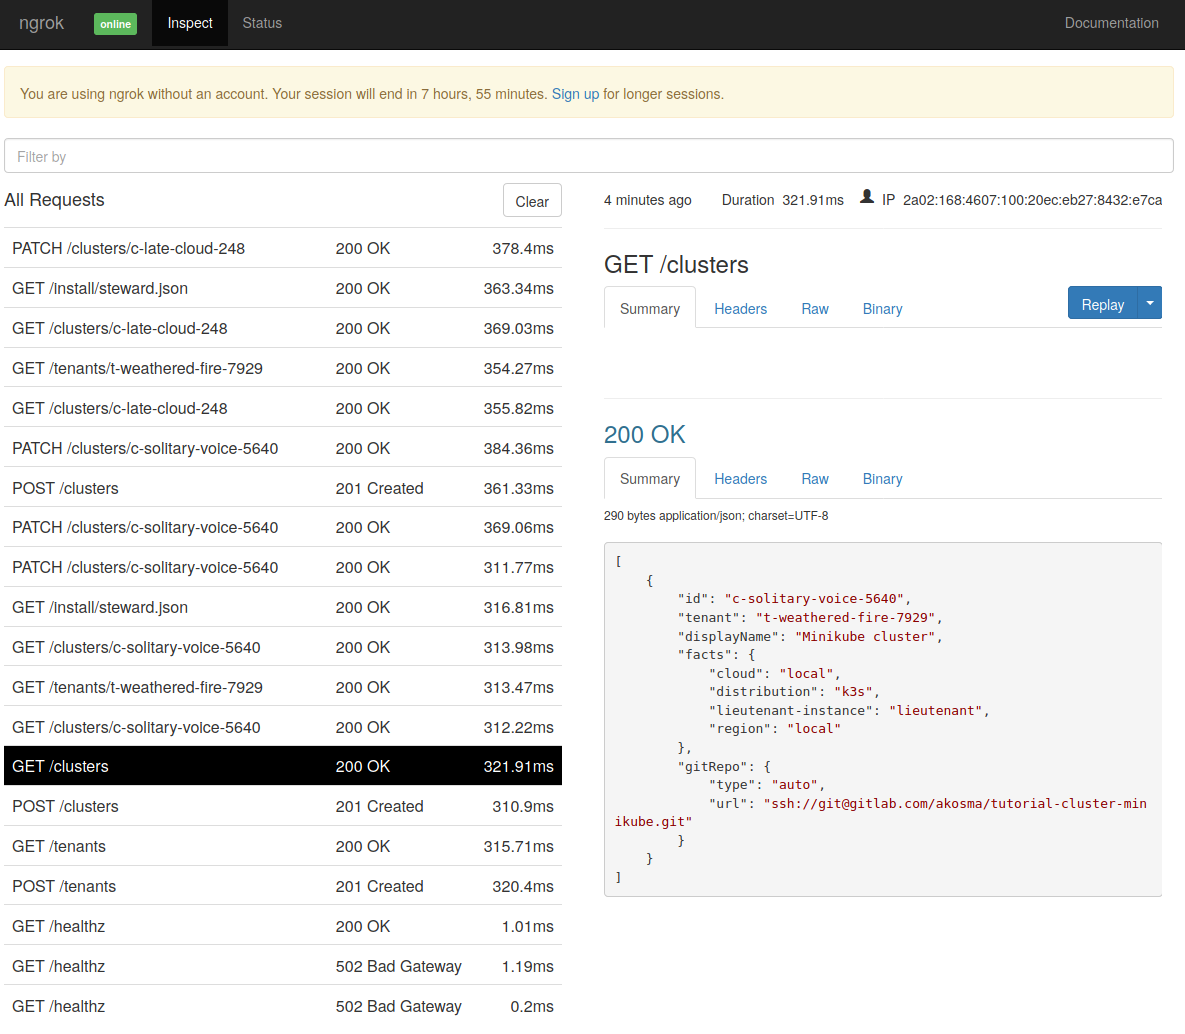
Inspecting the Lieutenant API traffic
Since we’re using ngrok to expose our Lieutenant API we can inspect all the requests exchanged between the clusters and Lieutenant. For that, just open a browser window and point it to localhost:4040/inspect/http. The following image shows a screenshot of a typical Lieutenant API session.
Creating a Commodore Component
Now we’re getting to the actual subject of this tutorial! Let us dive into the real task of creating a new Commodore Component.
Using the Commodore Docker Image
We are going to use now the commodore tool to generate and compile our new component. This tool is written in Python and requires quite a few dependencies; to make our lives easier, we are instead going to use the corresponding container image available in Docker Hub.
This is why it is strongly recommended that you define an ad-hoc shortcut, as explained in the "Running Commodore" page, which will make using commodore a much simpler task. That page contains information relevant for Linux and macOS users.
But for this tutorial, you can simply run the following command to get the job done:
$ source commodore_command.shUpon completion, you will have the commodore, commodore_compile_all, and commodore_push_all commands ready to use.
Checking out the Commodore Project
In order to create a new component, we need to prepare a working directory for Commodore.
$ mkdir -p commodore
$ cd commodore
Preparing the working directory
The easiest way to prepare a working directory for Commodore is to compile a cluster catalog. This operation will create all the directories which Commodore expects to be present when creating a new component. The following command will compile the catalog for one of the clusters which we’ve created previously.
$ CLUSTER_ID=$(kubectl --context minikube -n lieutenant get cluster --no-headers -o custom-columns="NAME:.metadata.name" | head -n1)
$ commodore catalog compile ${CLUSTER_ID}
We don’t have to repeat this operation for each cluster. But if you wanted, you can use the commodore_compile_all command instead. This command was created when you source commodore_command.sh previously.
Creating a New Commodore Component
With our catalog ready to use, we can create a new component. In this case, we want to create a component that automatically deploys a very simple application called the "Fortune Cookie Service" to our clusters. This application, written in Python, returns a funny "fortune cookie" message in the console.
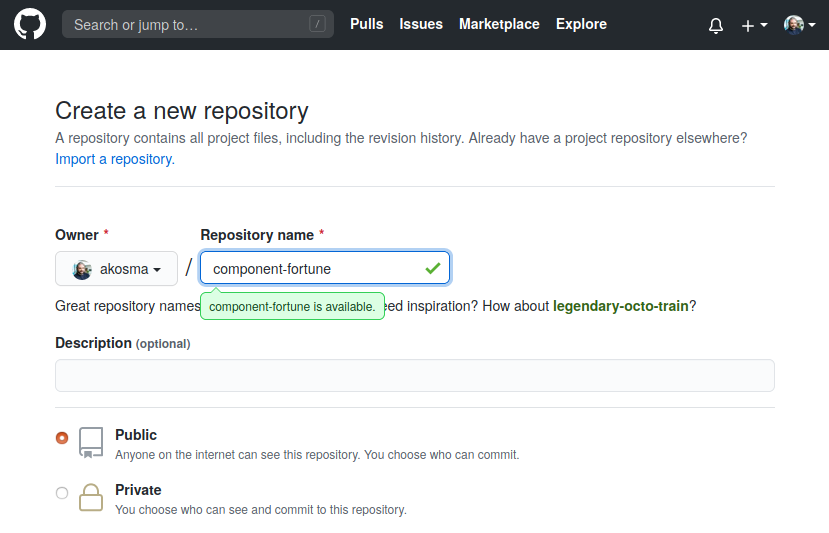
Let us create the component first:
$ commodore component new fortune --owner ${GITHUB_USERNAME}
Adding component fortune...
Component fortune successfully added 🎉
The new component is located now in the dependencies/fortune folder. We can edit it using Visual Studio Code:
$ code dependencies/fortune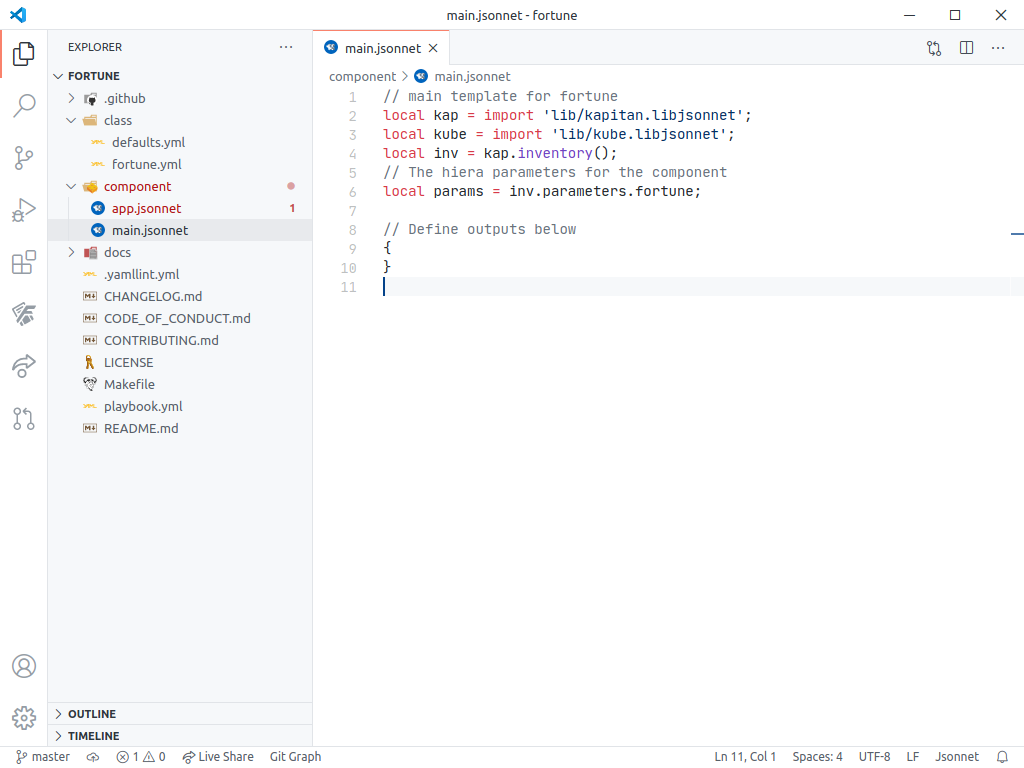
Commodore Components are usually written using Jsonnet (pronounced "jay-sonnet"), a data templating language for app and tool developers. If you have never written Jsonnet before, do not worry; just know that all valid JSON files are valid Jsonnet files, and that Jsonnet provides useful extensions, such as variables and functions, and various export formats, which make it easy to write very complex JSON applications with it.
In Visual Studio Code, open the component/main.jsonnet file, and replace its text with the following:
local kap = import 'lib/kapitan.libjsonnet';
local kube = import 'lib/kube.libjsonnet';
local inv = kap.inventory();
local params = inv.parameters.fortune;

local namespace = 'syn-fortune';
local appName = 'fortune-app';
local portName = 'fortune-port';
local containerName = 'vshn/fortune-cookie-service:latest';
local labelSelector = {
  app: appName,
};

{
  namespace: kube.Namespace(namespace) {
    metadata: {
      name: namespace,
      labels: {
        name: namespace
      },
    },
  },

  service: kube.Service('fortune-service') {
    metadata: {
      name: 'fortune-service',
      labels: labelSelector,
      namespace: namespace
    },
    spec: {
      ports: [
        {
          port: 3000,
          targetPort: portName,
        },
      ],
      selector: labelSelector,
      type: 'LoadBalancer',
    },
  },

  deployment: kube.Deployment('fortune-deployment') {
    metadata: {
      name: 'fortune-deployment',
      labels: labelSelector,
      namespace: namespace
    },
    spec: {
      replicas: 2,
      template: {
        spec: {
          containers: [
            {
              image: containerName,
              name: 'fortune-container',
              ports: [
                {
                  containerPort: 9090,
                  name: portName,
                },
              ],
            },
          ],
        },
        metadata: {
          labels: labelSelector,
        },
      },
      selector: {
        matchLabels: labelSelector,
      },
      strategy: {
        type: 'Recreate',
      },
    },
  },
}
This Jsonnet file provides the definition of a complete Kubernetes deployment. However, instead of being specified in YAML, this file specifies it in Jsonnet format. After the import statements we define a few variables. The entries that follow define various Kubernetes objects: a deployment, a service, and a namespace to hold everything together.
|
Creating Jsonnet files from YAML
To create your own Jsonnet files, you can just translate them from plain YAML using either the yq tool, or the YAML to JSON extension for Visual Studio Code. This is exactly how we created the Jsonnet examples for this tutorial! |
Open the component/app.jsonnet file and replace its contents with the following:
local kap = import 'lib/kapitan.libjsonnet';
local inv = kap.inventory();
local params = inv.parameters.fortune;
local argocd = import 'lib/argocd.libjsonnet';

local app = argocd.App('fortune', params.namespace, secrets=false);

{
  'fortune': app,
}
The secrets=false parameter is required. Since we do not require secrets for this tutorial, we can safely disable this.
Compiling the Component
Now that we have written our component, let’s compile it to see if it’s generating what we need:
$ commodore component compile dependencies/fortune
Compile component fortune...
GET https://github.com/bitnami-labs/kube-libsonnet/archive/28743043c44c1f5cd69688c202e72d5f677ad02f.tar.gz 200
Compiling catalog...
Compiled fortune (0.07s)
 > Component compiled to /app/data/compiled/fortune
Postprocessing...

$ ls compiled/fortune/fortune
.  ..  deployment.yaml  namespace.yaml  service.yaml

$ cat compiled/fortune/fortune/namespace.yaml
apiVersion: v1
kind: Namespace
metadata:
  labels:
    name: syn-fortune
  name: syn-fortune
Our component compiles! Let us create a new project in GitHub to push our code into:
$ cd dependencies/fortune
$ git add .
$ git commit -m "Added code to component"
$ git push --set-upstream origin master
$ cd ../../
Deploying the Component to our Clusters
Now that we have a component that compiles, and that we have pushed it to GitHub, we want to deploy it to our clusters.
We only need edit one file for that:
$ cd inventory/classes/$TENANT_IDThis repository is a clone of the tutorial-tenant project in your GitLab account.
Edit /common.yml and add this text:
parameters:
  components:
    fortune:
      url: https://github.com/$GITHUB_USERNAME/YOUR_COMPONENT_NAME.git
      version: master
applications:
  - fortune
And once again, commit and push your changes to the tenant GitLab repository:
$ git commit -a -m "Added fortune component"
$ git push
$ cd ../../../
Since we edited the common.yml file, the changes will propagate to all clusters. If you want your changes to apply to just one cluster, edit the corresponding file in the same folder.
Deployment
We’re ready! Now we just have to recompile both catalogs and push the changes. For that we need to recompile the catalogs, but this time using the --push parameter, so that our changes are sent to their respective GitLab repositories.
$ kubectl --context minikube -n lieutenant get cluster
NAME                    DISPLAY NAME       TENANT                  AGE
c-aged-cloud-4988       Kind cluster       t-weathered-fire-7929   3m58s
c-late-cloud-248        K3s cluster        t-weathered-fire-7929   8m24s
c-solitary-voice-5640   Minikube cluster   t-weathered-fire-7929   10m

$ commodore catalog compile --push c-solitary-voice-5640
# … lots of text…
Postprocessing...
Updating catalog repository...
 > Changes:
     Added file manifests/apps/fortune.yaml
     Added file manifests/fortune/deployment.yaml
     Added file manifests/fortune/namespace.yaml
     Added file manifests/fortune/service.yaml
 > Commiting changes...
 > Pushing catalog to remote...
Catalog compiled! 🎉
We have to do this for all clusters! The compile --push process can take several minutes. Let’s be patient!
$ commodore catalog compile --push c-aged-cloud-4988
...

$ commodore catalog compile --push c-late-cloud-248
...
If you are lazy enough, try using the commodore_push_all command!
|
What is happening behind the scenes? Argo CD, itself managed by Steward, is watching these repositories; it will automatically pick up the new state, and seamlessly deploy it across our two clusters in a few minutes.
With K9s we can watch our clusters as they pick up the changes and apply them in all transparency. The namespace syn-fortune will contain the required deployment, pods, and service.
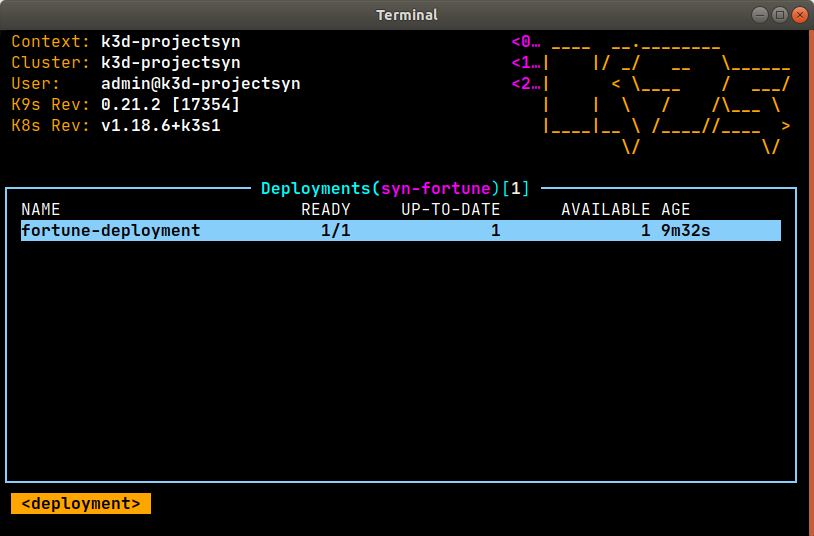
syn-fortune namespace in K3s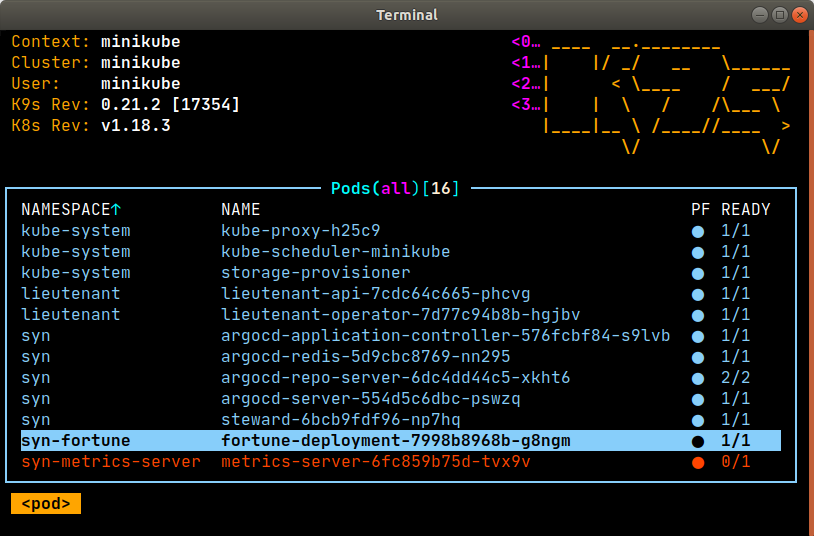
syn-fortune and lieutenant pods in MinikubeAccessing the Argo CD Console
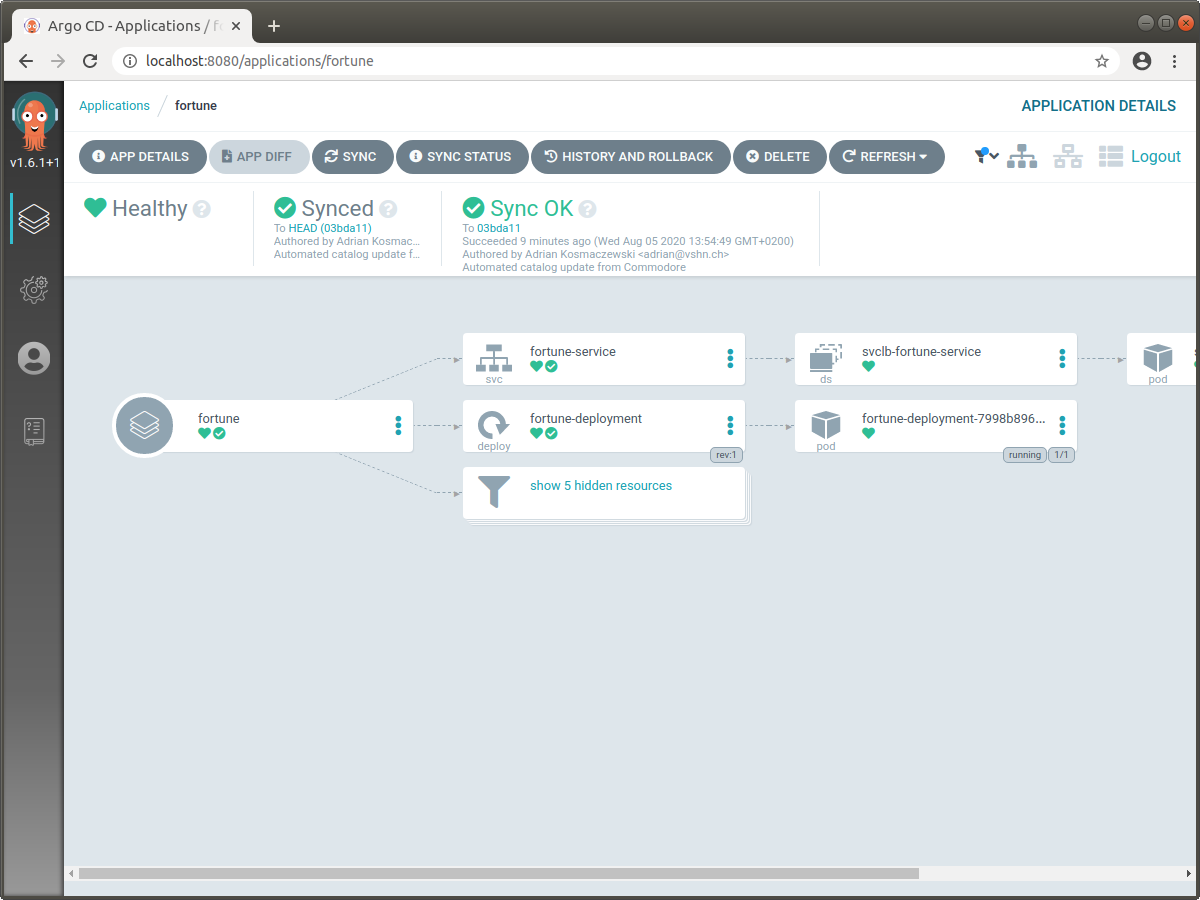
Argo CD is a declarative GitOps continuous deployment tool for Kubernetes. It is managed by Steward, and takes care of synchronizing and automatically updating the state of our clusters following changes in the configuration. You can access the Argo CD console in both clusters through these steps:
First, retrieve the Argo CD admin password with this command:
$ kubectl --context minikube -n syn get secret/steward -o jsonpath='{.data.token}' | base64 --decode | pbcopy
The pbcopy command is usually found in macOS. In Linux, you can alias pbcopy="xclip -selection clipboard".
|
Second, redirect traffic to Argo CD:
$ kubectl --context minikube -n syn port-forward deploy/argocd-server 8080:8080And third, open localhost:8080 with the username admin and the password you copied in the previous step.
You can repeat this steps to access the console in the K3s cluster, by changing the value of the kubectl --context parameter.
Executing the fortune-service
Of course you can test the fortune-service running in your clusters using the following commands:
For k3d:
$ kubectl --context k3d-projectsyn -n syn-fortune port-forward svc/fortune-service 8081:3000

# In a different terminal:
$ curl http://localhost:8081 --header "Content-Type: text/plain"| In K9s you can add port forwarding to a pod simply by selecting the pod and hitting the Shift+F key combination. |
For Minikube:
$ curl $(minikube service fortune-service --namespace syn-fortune --url) --header "Content-Type: text/plain"Cleanup
We are done! You can now remove the clusters in your computer, and also remove the projects you’ve created in GitLab.
Just run the ./5_delete.sh script to deregister and stop all local clusters. You can also get rid of the Commodore component project you’ve created on GitHub if you don’t need it anymore.
The GitLab projects tutorial-tenant, tutorial-cluster-minikube, and tutorial-cluster-k3s will be automatically deleted by the Lieutenant Operator.
$ ./5_delete.sh
===> Find Tenant ID
===> OK: TENANT_ID variable set
===> Removing all clusters
cluster.syn.tools "c-aged-sea-7813" deleted
cluster.syn.tools "c-snowy-sunset-5873" deleted
===> Removing tenant
tenant.syn.tools "t-solitary-field-4017" deleted
===> Waiting 20 seconds for the removal of GitLab repositories
🔥  Deleting "minikube" in docker ...
🔥  Deleting container "minikube" ...
🔥  Removing /home/username/.minikube/machines/minikube ...
💀  Removed all traces of the "minikube" cluster.
INFO[0000] Deleting cluster 'projectsyn'
INFO[0002] Deleted k3d-projectsyn-server-0
INFO[0002] Deleting image volume 'k3d-projectsyn-images'
INFO[0002] Removing cluster details from default kubeconfig...
INFO[0002] Removing standalone kubeconfig file (if there is one)...
INFO[0002] Successfully deleted cluster projectsyn!
Conclusion
I hope this tutorial has given you a good idea of what Commodore Components are, how they work, and how they can help you in your DevOps workflow.
Commodore Components can be used to deploy monitoring tools, to change the state of lots of clusters at once, to perform backup operations, to modify network policies, and many other tasks that otherwise would have to be performed manually.
Creating Commodore Components at the moment is a long task, but the rewards are high in terms of the economies of scale DevOps reach when managing multi-cluster architectures. As a next step, we recommend that you read the Commodore Component Developer Guidelines.
If you create a new open source Commodore Component, add the commodore-component tag on your GitHub project and let us know about it! We will be thrilled to check it out, and who knows? We might even contribute back to your effort with issues or pull requests.